Custom metal finishing service
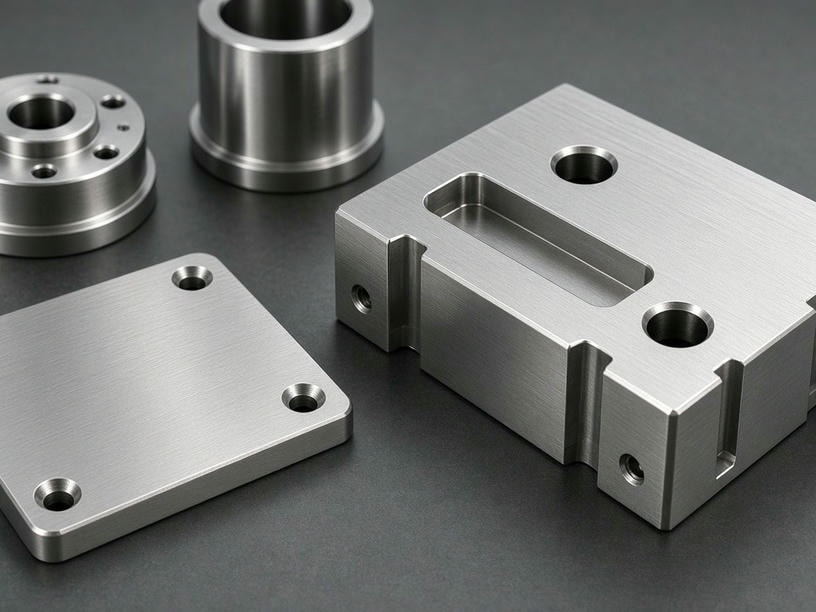
Brushing Finish for Custom Aluminum and Stainless Steel Parts
Create a controlled linear texture, reduce visible machining marks, and maintain consistent appearance across assemblies with brushing from PartsMake.
We support CNC machined parts, sheet metal components, turned parts, housings, panels, brackets, covers, and visible hardware in aluminum and stainless steel.
120–400
Typical abrasive grit range
Al + SS
Core material coverage
Controlled surface appearance
What brushing does to a metal surface
Brushing is a mechanical finishing process that creates fine, directional lines with abrasive belts, wheels, pads, or controlled finishing tools.
Appearance control
Creates a consistent directional texture and makes light machining marks less visible.
Lower glare
Reduces reflection on panels, equipment housings, covers, and visible hardware.
Finishing preparation
Prepares aluminum for anodizing with a defined grain pattern and planned surface direction.
Repeatability
Supports consistent appearance across low-volume, prototype, and repeat production.
Important: Brushing removes a small amount of material and changes surface appearance. It does not replace dimensional machining, grinding, or polishing. Critical dimensions, edge conditions, and masking requirements should be reviewed before production.
Integrated process route
Brushing capabilities at PartsMake
We support brushing after CNC machining, sheet metal fabrication, turning, milling, and other manufacturing steps. Our team reviews geometry, material, tolerance requirements, visible surfaces, and finishing sequence before selecting the process.
| Part type | Common purpose | Process before brushing |
|---|---|---|
| Aluminum housings | Cosmetic surface before clear or black anodizing | CNC milling, 5-axis machining |
| Stainless steel panels | Directional grain for visible equipment surfaces | Sheet metal cutting and bending |
| Brackets and frames | Uniform appearance and reduced handling marks | CNC machining, sheet metal fabrication |
| Covers and faceplates | Controlled front-surface texture | CNC milling, sheet metal |
| Turned sleeves and rings | Circumferential or axial linear finish | CNC turning, mill-turn machining |
| Prototype appearance parts | Production-intent appearance during design review | CNC machining, metal 3D printing, sheet metal |
Brushing can be combined with deburring, bead blasting, anodizing, passivation, laser marking, assembly, and packaging when the project requires more than one process.
Technical reference
Brushing finish parameters
Final results depend on abrasive grit, pressure, material hardness, original surface condition, geometry, and later treatment such as anodizing or passivation.
| Abrasive grit / pad | Typical Ra range | Texture direction | Suitable materials | Post-processing compatibility |
|---|---|---|---|---|
| 120 grit | Ra 1.6–3.2 µm | Strong visible linear grain | Aluminum, stainless steel | Suitable before anodizing when coarse texture is acceptable; may show strong grain after clear anodizing |
| 180 grit | Ra 0.8–1.6 µm | Medium linear grain | Aluminum, stainless steel | Common before anodizing, passivation, cleaning, and laser marking |
| 240 grit | Ra 0.4–1.2 µm | Fine controlled grain | Aluminum, stainless steel | Often used for cosmetic aluminum housings before clear, black, or color anodizing |
| 320 grit | Ra 0.2–0.8 µm | Fine satin line | Aluminum, stainless steel | Good for tighter cosmetic appearance; compatible with anodizing and passivation after cleaning |
| 400 grit | Ra 0.1–0.4 µm | Very fine directional satin | Aluminum, stainless steel | Used for subtle lines; anodizing may soften the visible brushing effect |
| Non-woven abrasive pad | Depends on base surface | Soft satin direction | Aluminum, stainless steel | Useful for blending, light finishing, and preparation before cleaning or marking |
Ra values are typical references, not guaranteed values for every geometry. When roughness is critical, add measurable Ra requirements and inspection locations to the drawing.
Aluminum brushing before anodizing
Brushing creates the grain while anodizing changes color, corrosion resistance, and surface durability. Anodizing does not hide inconsistent brushing and may make uneven grain more visible.
- ●Clear anodizing usually preserves the natural brushed aluminum appearance.
- ●Black anodizing can reduce contrast but may still show direction clearly.
- ●Alloy, surface condition, grain depth, edges, welds, and cast areas can affect the final result.
Confirm alloy, brushing direction, grit, anodizing type, color, and visible surfaces before production.
Stainless steel brushing
Brushing supports controlled satin appearance, reduced reflection, and directional texture on stainless steel panels, brackets, covers, food equipment, lab equipment, medical enclosures, and industrial hardware.
- ●Plan grain direction around formed bends, welded areas, countersinks, and visible edges.
- ●Welded areas may require blending before final brushing.
- ●Passivation can be included after brushing and cleaning when required.
Available for stainless steel sheet metal parts and machined stainless steel components.
Drawing communication
How to specify brushing direction on drawings
If direction is not specified, a supplier may choose the easiest processing direction, creating mismatched parts in an assembly.
- Use arrows to show grain direction on each visible surface.
- State “Brush direction along X axis” or “parallel to long edge.”
- Label A-surfaces with grit, Ra range, and direction.
- Add masking notes for surfaces that must not be brushed.
Example drawing notes
Cosmetic aluminum face
“A-surface: 240 grit linear brushing, grain direction left to right, clear anodize after brushing.”
Stainless steel panel
“Visible surface: brushed finish, grain parallel to long edge, Ra 0.4–1.2 µm.”
Matching covers
“All exterior visible faces to have same brushing direction after assembly.”
Protected sealing face
“Do not brush sealing surface; protect during finishing.”
For 3D CAD-only projects, we can mark up screenshots or use surface labels during manufacturing review.
Pre-production review
Manufacturing review before we finish the part
Brushing is one step in a complete manufacturing workflow. Before quoting or starting production, we review how the finish affects the full part.
01
Material and route
Material type, alloy, CNC or sheet metal process, and finishing sequence.
02
Surface definition
Visible surfaces, grain direction, grit, Ra range, and masking requirements.
03
Risk review
Edges, deburring, critical dimensions, tool marks, defects, and flatness concerns.
04
Downstream process
Anodizing, passivation, laser marking, coating, inspection, and cosmetic acceptance.
This review helps catch issues before material, machining time, or finishing cost is committed. For example, we can assess how brushing and black anodizing may affect tool marks, edge transitions, visible orientation, and part condition.
Materials we commonly brush
We most often apply brushing to aluminum and stainless steel, while other metals can be reviewed according to the part and finish requirement.
| Material | Common grades | Brushing notes |
|---|---|---|
| Aluminum | 6061, 6063, 5052, 7075 | Good for cosmetic brushing and anodizing |
| Stainless steel | 304, 316, 430 | Good for satin linear finish and passivation |
| Steel | Low carbon, tool steel | Usually followed by plating, coating, or oil protection |
| Brass / copper | Project dependent | Review oxidation and coating requirements |
| Titanium | Project dependent | Review abrasive choice and surface requirements |
Projects that are a good fit
When another finish may be better
Brushing may not suit deep tool marks, heavy casting defects, extremely complex internal surfaces, or mirror-polished requirements. We may suggest machining changes, bead blasting, polishing, grinding, or a different finishing sequence.
Quality and consistency
Inspection and appearance control
Quality control includes dimensional inspection and appearance review. The exact inspection method depends on the drawing and project requirements.
- Dimensional inspection of machined or fabricated features
- Surface roughness checks when Ra is specified
- Visual inspection of brushing direction
- Review against approved samples or photos
- Verification of masking areas
- Inspection after anodizing or passivation
- Packaging checks to reduce rubbing marks
- Approved sample support for repeat production
Why PartsMake
A complete manufacturing flow, not an afterthought
We manufacture the part and manage the finish together, considering machining marks, geometry, edge conditions, grain direction, and later treatments from the beginning.
One project flow
CNC machining, sheet metal fabrication, brushing, anodizing, passivation, and related processes can be coordinated together.
Clear finish definition
We confirm grain direction, visible surfaces, grit, roughness, masking, and acceptance criteria against the drawing.
Production flexibility
Support is available for prototypes, pilots, low-volume orders, and repeat production.
Common questions
Brushing finish guidance
Request an RFQ
Send your brushing finish part requirements
Send CAD files, 2D drawings, material requirements, quantities, finish notes, and any sample photo or target appearance. We will review manufacturability, finishing risks, and the required process route.
- Material and grade
- Required quantity and 2D drawing with tolerances
- Brushing grit or Ra requirement, if known
- Grain direction on visible surfaces
- Anodizing, passivation, coating, or marking requirements
- Cosmetic surface classification and assembly relationship
Email:
Address: